Pages

Sunday, September 30, 2012

Building Sectional Terrain, Part IV

 Whew - there was a lot of progress this morning on the Terrain for my Lundy's Lane game at Fall-In this morning.  First up was the bane of any word working project - sanding.  There is in an inverse relationship between the skill of a woodworker and the amount of sanding required post fitting.  Lets just say that I buy my sand paper in bulk....

 All 5 frames were sanded down and cleaned up.  As you can see, some required a lot of sanding.  The sanding took about an hour and a half and I was able to listen to episode 44 of the WWPD podcast.  While it's ok to listen to something while sanding it's a very good safety rule to never wear ear buds when working with cutting or drilling tools.

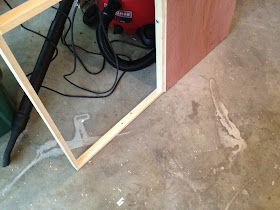
Once sanded, I began a test fitting of the boards just to make sure everything went together well.  In the picture is my Robotic's team's favorite and most important tool - a rubber mallet which has been dubbed "The Persuader".  Many a troublesome gear, sprocket or bent frame has been "persuaded" back into place during a tournament. I used it today to make sure the locking bolts went into place.

 Here are the five, two x five frames assembled together.  While there are some minor gaps everything seems to fit well.


 Next up, is filling the gaps in some of the luan plywood.  I use a standard filler that goes on pink but dries white.  Once it's white it's ready to be sanded.

 The first test for scenicing.  I'm using Woodland Scenics static grass flock in various shades - this was what I had on hand.  The method I use is the following:
(1) Paint a patch of the board with a latex paint (very durable).
(2) Sprinkle three of four shades of flock
(3) "Jiggle" the board
(4) Repeat until the board is covered
(5) Tilt the board up and shake off excess flock
(6) Apply a liberal spray of diluted matt medium
(7) Sprinkle a bit more flock on any bare patches
(8) Set aside to dry.

One useful tip is to use a plastic sheet to catch the excess flock and use it for the next board - it's already pre-mixed!

 Here's the first board about half way done.

 First board completed (only four more to go).  In the middle right you can see a bump from some cork board I used as a experiment to add some height.  I didn't like how it turned out and so opted not to try it on any other boards.  I'll rely on hill pieces an can lay onto the board for elevation changes.


 Here's a shot of three completed boards put off to the side to dry.

 The fourth board drying.  I forgot to take a picture of the fifth one but it's looks like all the others.  Once the boards have dried over the next 24 hours, I'll go back and add some details and fill in any bare spots.  I do think I will make the green patches a bit bigger.

UPDATE: make sure you lightly "wet" the boards before applying the diluted matt medium - see post V for the results if one doesn't.


 With the boards done (for now), I decided it was time to start building the hill that was such a prominent feature in the battle.  The base is 1/8 inch MDF board and the hill will be approximately 3 feet x 2 feet.

Here's the hill cut-out (my gosh but cutting MDF makes a mess).  I'm using some 1x2 scrap to brace the base of the board and start adding the elevations.  Hopefully the hill will get completed next weekend!


Friday, September 28, 2012

First Game of X-Wing

 My son and I played a quick game of the new Fantasy Flight miniature game "X-Wing".  I had gotten wind of this game from the guys over at WWPD and was hooked.

The game is a blast.  Our first game went down to the wire with my X-Wing finally seeing off the last of 2 Tie fighters after a lot of maneuvering.  Both fighters were down to there last hit points so it was a lot of fun. I'm sure we got some of the rules wrong but the game was a blast.


From a component side, I think the game is well worth the $31.99 I paid for it from the War Store. The pre-painted mini's (one X-Wing and two Tie Fighters) are very well done.  All of the other game components are also very of a high quality.

Game play is simple yet there is a good deal of depth.  The movement dials are a very nice innovation and keep the game moving along briskly.

I suspect there will be a number of re-fights over the course of the weekend but that will need to wait as Saturday morning will be occupied with a college visit to Drexel's Engineering School for Sean and myself.

Monday, September 24, 2012

Building Sectional Terrain, Part III

 After some non-war gaming project delays (robotics and work), the frames for the five 2x5' terrain sections are complete.  They came out nicely and are both rigid and light (coming is a 4 lbs each).

The next step will involve some light sanding and then sealing the wood.  I am toying with the idea of lining the tops with 1/4 inch think cork flooring and then using a file and Dremel to create undulations in the terrain.  I should perhaps do a test piece as I'm worried about how the edges will wear and how my terrain pieces will look when placed on top.

Here's a shot of the last two sections awaiting attachment of the final 1x2' top and a cross-brace that goes under it for support.

I should start scenicing the boards this weekend and have then finished by mid October.

Sunday, September 16, 2012

Robotics Team Wins the "Battle-O-Baltimore"!

 Yesterday was a big day for my son's FRC robotics team - they won the an "off-season" event called the "Battle-O-Baltimore".  It was a great event and winning was very unexpected.  The first shot is of the three robot's of the winning alliance.  Our robot is in the foreground with our team number 4067.  I didn't take a lot of in-game photos as I was coaching but hopefully I'll get some up.


 Here's a shot of the winning alliance plotting strategy for the semi final rounds.  Being rookies our robot wasn't the best shooter (maybe a 10% accuracy ratio) so we created a program that feeds balls to a partner robot during the autonomous phase so they can shoot.  During games our primary role was to play defense (beat the heck out of the opposition robots) and then in the last 20 seconds rush over to a swing bridge tip it down and then balance on it.  Not as easy as it seems as the robots weigh up to 120 pounds (excluding the battery)!
 Here's a shot in the pit area where the team is repairing some damage that occurred in one of the qualifying rounds.  My son is re-drilling a pivot point for the swing arm (used to push the swing bridge down).  The other guys are repairing the belt assembly for the ball movement system.  Our 'bot got the heck beat out of it but we gave more than we received.

Here's a picture of the team in the queue for a match.  There were 5 qualifying rounds and then we played in 7 championship matches so that was a lot of play time for the 'bot
 Here's a picture of the drive team during set up the night before.  From left to right is my son, Sean, who was the driver, Albert lead programmer and "human player - role was to inbound balls that were scored, and Ibrahim who operated the ball lift, shooter and bridge arm.
 A picture of the 'bot the night before.  We're currently sponsored by NASA, JC Penneys and a local hardware store -Kendalls.  There's room for more sponsorship names so watch this space as we may have some interesting new sponsors soon.  Robotics at this level can be very expensive!

Our robot features a six wheel all wheel drive drive train that allows us to push any other robot around.  The ball collection device is a brush assemble (it looks low-tech but works like a charm) and a belt assembly that carries the basket balls up to the shooter.  The shooter is essentially a version of a pitching machine that spins at up 3500 RPM but we could never figure out how to make it accurate.  This was out first year in FRC, so we're off to a promising start.

Proof that if one has enough Donuts anything is possible.  We arrived a bit early (ok, a lot early) on Saturday morning and couldn't get into the pit area.  Luckily I found a Dunkin Donut shop close by and purchased four dozen and saw a magical transformation of surly teens into happy campers. Through the power of Donuts, anything is possible.

That's it for FRC until January when the new game is announced and the six week build session commences.  Now we switch to FTC, which are smaller but more complicated robots.

Oh and I still need to finish my terrain for Fall-In...

Friday, September 14, 2012

Fall-In 2012: F-103 Battle of Lundy's Lane, Version 2.0

My War of 1812 game for Fall-In has just been posted in the Preliminary Event List (PEL) as game "F-103 The Battle of Lundy's Lane, version 2.0!  The game run will run on the first day of the con (Friday 11/2) at 11:00.  There will be room for 6 brigade commanders (3 US and 3 British) plus an army commander for each side.

As mentioned earlier, the game features prize support from not one but two miniature companies Architects of War and Knuckleduster Miniatures.  

If you've never played a War of 1812 game think of of it as Napoleonics with an American flair.  There's limited calvary, widely varying quality of infantry, colorful commanders, more than the usual share of battlefield confusion AND Native American War Parties - what's not to love?

This game will be played with using 28mm miniatures organized into "big Battalions" of no less than 36 figures each.  Terrain will be custom made or come from the great Architects of War line and will feature a prominent hill for both sides to squabble over!  Probably the only downside is that players will be subjected to my form of humor - but nothing's perfect.  As with all of my past convention games, rulings of the game master can and will be influenced by the side who provides that person (me!) the best beer.  Beer will be judged for both quantity and quality.  Please note that the provision of a "Coors Light" to the GM results in an automatic army rout. That penalty may seem harsh but it's in the rules, trust me.


Wednesday, September 12, 2012

This Year's Robotic's Challenge

Last Saturday, my son's First Tech Challenge (FTC) Robotic's team attended the unveiling of this year's challenge.  The competition is titled "Ring-it-Up" and is essentially a more complicated version of tick-tack-toe played via 2 on 2 robots.  I coach 2 teams at the FTC level through my son's scout troop and the boys are very excited about this year's challenge.

There are two good things about this years challenge - one the field has no real obstacles to contend with and one of the ways to score at the end of the game is for a robot to lift it's teammate up.  If the robot is a full inch off the ground it's 30points, plus 5 points for each inch after that!

I've clipped out an animated video that describes the game play and how the scoring works.  It's pretty intense.  In FTC there are size restrictions on the robot as they must start each match fitting within an 18 inch cube.  Some of the scoring elements are three to four feet high so means we'll need some form of robotic arm or telescoping platform.


Outside of getting prepared for Fall-In there will be limited war-gaming related activity as our basement gets turned into a robot factory for the next few months.  But then again, competitive robotics is a blast so it's a pretty good trade-off!


Tuesday, September 4, 2012

Building Sectional Terrain, part two

 A bit more progress tonight as all five frames have been assembled.  The tops should be done in a few days.  I still need to add some brass corner brackets along the inside to increase sturdiness and, more importantly, prevent warping.

 I was pretty pleased that the frame sizing came out uniform - well it will be uniform after a bit of sanding!


With the five "flat" land terrain section frames complete, the next step will be one with a recessed river.  Given the recessed cuts that will be made at the top and the bottom that frame will need a bit of extra reinforcement.

Monday, September 3, 2012

Building Sectional Terrain, part 1

 With Fall-In now 2 months away, I decided I should get busy and build the terrain sections I need for the game.  I'm planning on five flat sections, each of which is 2 feet by 5 feet.  I'll also  build a river section just for some added interest.  The first picture shows the cut wood for framing the first 5 sections.  It's 110 feet of 1x2 stock lumber.

 Here are the first two frames that are assembled and bolted together.  You can also see the luan plywood I'm using for the top.  The design is intended to be very light but sturdy.  I cut enough lumber to have three cross braces going across rather than the one in the middle.  I wanted to make sure the measurements weren't off so I skipped adding two of the cross braces for now.  The luan plywood comes in 2x4 sheets so there will be some trimming to get them to fit a 2x5 frame.

 The frames are bolted together using 5/8, 2.3 inch carriage bolts.  It may be a bot of overkill for the project but I like the steam-punk look they add when the wood if finished at the end.

Bolt holes were drilled to allow the panels to be attached via the long length or the short one.  I'm not sure I'd really have these boards attached in a 6x10' configuration but one never knows and it's a lot easier to drill out the holes before assembly.

Well that's it for now.  Part two will have the other three panels completed and then I'll think about how to do the river.


Frog Rescue: Operation Successful!

There was a bit of excitement over at the Uber Geek Lair.  As I was floating about our pool (oops, I mean vigorously exercising - if my wife asks)  I heard a commotion in the shrubs behind me and then a series of splashes.  It seems that a rather large frog (over 12 inches long) was making a mad break for the safety of the pool.  Unfortunately for the frog, his pursuer, an enormous black snake (five to six feet) who had ahold of one of his legs, came with him!

I've always been a benefactor of our amphibious friends given their ravenous appetite for bugs so I had no choice but to spring into action.  I should point out that the impending frogicide must have made my blood boil because the water around me became a lot warmer upon seeing the aggressor serpent.

Years of carefully honed inactivity paid off as I was able to both yell and splash at the same time.  I'm not sure if it was the precision placement of jets of water or my high pitch little girl scream that drove off the dreaded viper or perhaps the combined arms effect of my attacks but my efforts were successful and the cad released the frog and retreated back to his hideout to assuredly plan other mischief (hopefully against the rabbits as those bast**** try to eat my brussels sprouts!).

With the immediate threat dispatched, I coolly went about trying to catch the frog in the pool, which is not as easy as it might seem.  After many attempts I think I tired him out and he submitted.  Outside of a few teeth marks he seemed OK and I did what any other man would do when holding a giant frog - bring him in the house to show the wife.  Elementary.

I'm sure you will all be shocked to hear that this potential new addition to our family was not greeted with open arms and in fact, I was told to release the poor creature immediately.  I'm paraphrasing my wife as any direct quotation of her utterances would not be fitting in an all ages blog.

Just another day on the Maryland Eastern Shore.  That's how we roll....