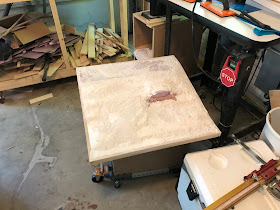
I do focus of figure stability so there are still layers but they're just not as a prevalent as some of my earlier hill attempts.
Once the scultpamold has set, it's time to cover the whole thing with my "secret" terrain tool - pre-mixed tile grout (and pre-colored!).
I do mix in a little PVA glue which really helps with hardness and makes the surface very durable. Application is dead simple - put on a pair of surgical gloves, grab a handful out of the can and plop it down. Now hears the tricky part - dip you finger in some water and then just spread it around. It's kind of like finger painting but for super important war gaming purposes.
20 minutes of "art therapy" later and all three panels have been textured. The tile looks good enough to leave patches with no ground foam.
Warning: Tile grout can be caustic to exposed skin so don't just use your hands without latex gloves. It's also really hard to get out from under your finger nails once set.
Here's a close up of the exposed rock face. I'll add some dry tile grout and pebbles later to simulate smaller rocks and rubble at the bottom. Don't worry about getting any of the "rock face" as you can pick it off while painting.
The sides of each panel need a good sanding the get the overflow off but that's not too hard. I used some 220 grit sand bagger wrapped around a piece of 1x2 wood. Any sand paper will do.
There are still a few seems that are visible - as you can see in the upper left corner but those will get covered up when the ground foam is applied.
The remaining steps are to paint the sides and apply the ground foam. that's maybe a total of 90 m minutes of work.
Time remaining until Historicon: 26 days, 11 hours and 25 minutes.


Looks excellent Miles.
ReplyDeleteThis is going to be awesome. You need to cancel all weekend plans and work strictly on this.
ReplyDeleteExcellent progress :)
ReplyDeleteVery impressive progress! Do you have a big clock in the workshop with the time remaining to historicon in luminous colour?
ReplyDeleteBest Iain