Ok enough preliminary ramblings - lets build something! One of the first things any new woodworker builds is a workbench - it's the heart of a workshop and something that you can decide how good it should look. I love building workbenches and have built at least 20 - mostly for friends.
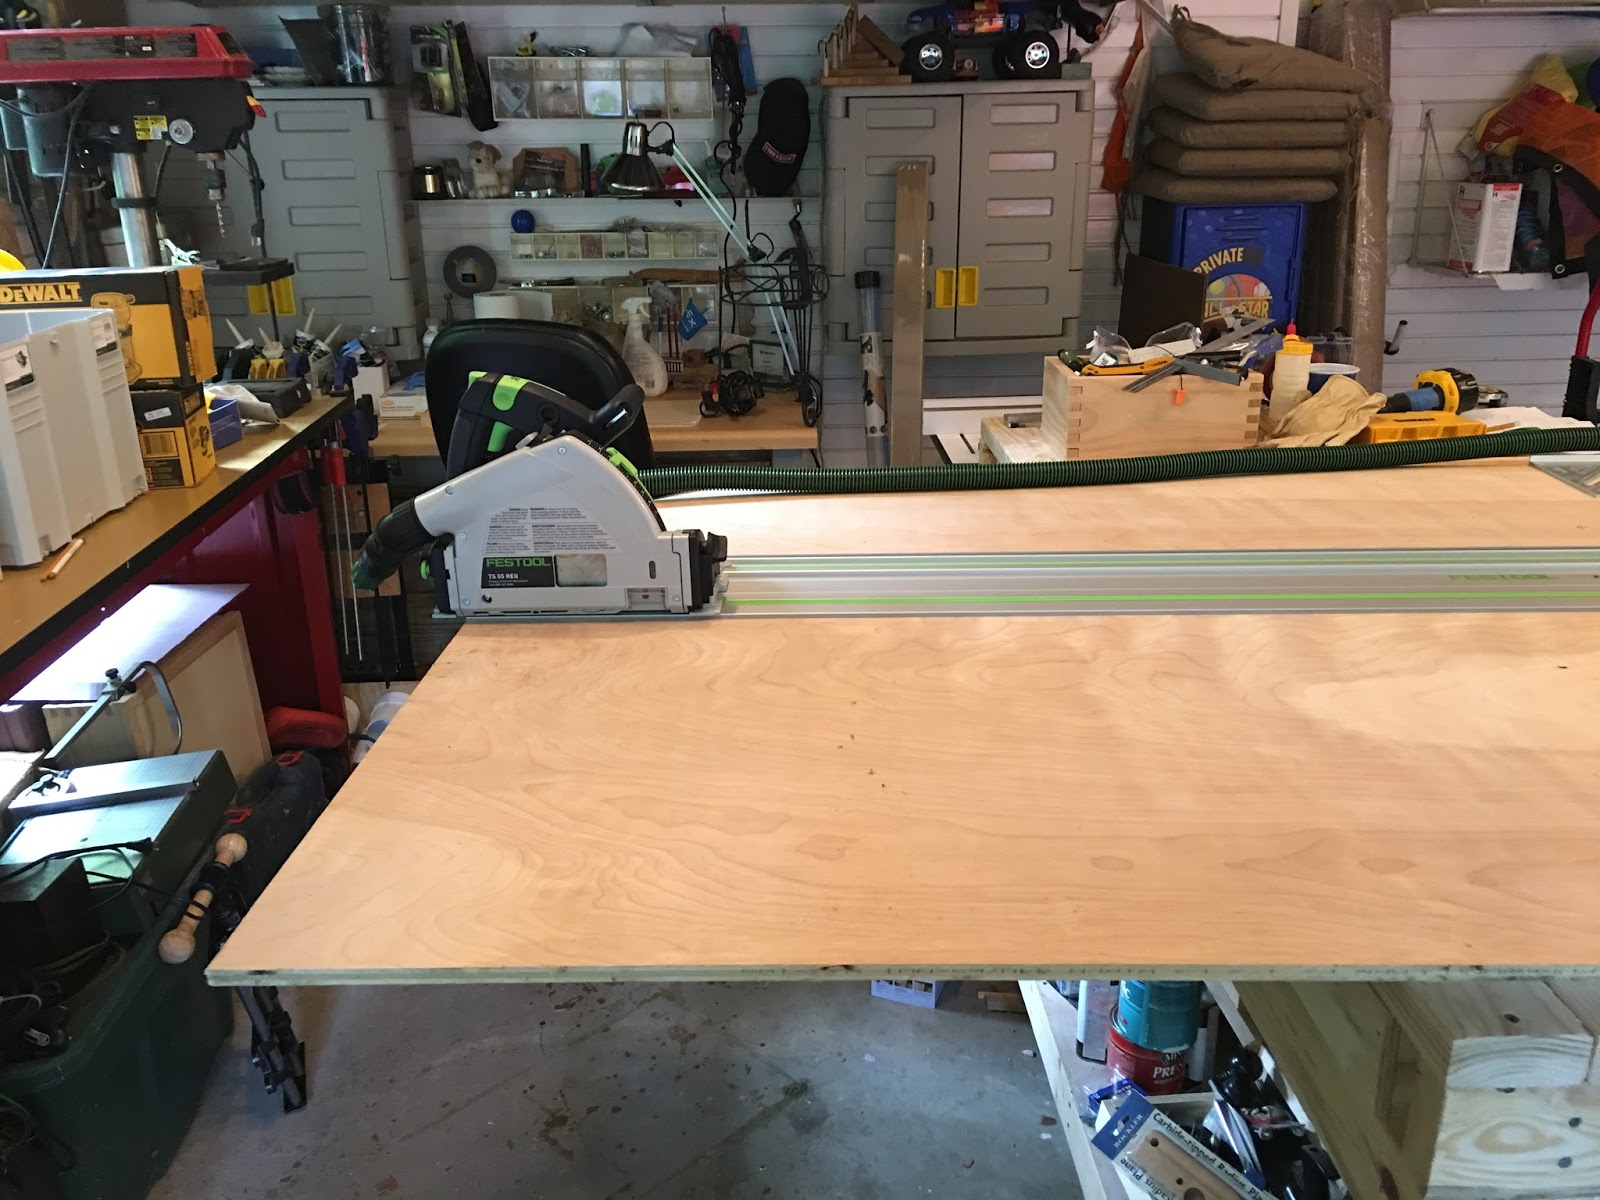
The first picture shows my brand new Festool track saw all set up and ready to rip (cut length wise along the grain) a 8 ft x 4ft sheet of 1/2 inch plywood. The resulting 2, 8ft x 2ft sheets will form the upper and lower decks of the workbench.
Looking at that gleaming festool straining at the starting line makes me think "Gentlemen, start your engines" - varooom!
It cut like a champ but then I realized I set the depth 1/16th of an inch to short so all I did was cut a very straight deep channel through the plywood - Dooohhhh. Actually woodworking really is just a series of mistakes that you learn to cover up better and better - just like miniature painting. Rather than reset the track saw, I got out my trusty japanese saw and separated the sheets in 20 or so seconds. Cuts like "butta" as they saw in New York.
I went out and purchased all the materials in the am, which consisted of 12 8 ft 2x4's. When doing a project its good to make all the basic cuts at the same time. Pictured are the 6 main supports for the bench and each is 31 inches long. It's really important that these be exactly the same length or my bench will not be level.
I needed to use 2 of the eight foot long 2x4's to cut the 6 31 inch lengths (3 from each). So how can I really tell if their the same length? Eyeballing isn't always that accurate, but I could....
Check the cut-offs. Since each board is 96 inches long and I'm using 93 inches for each of the three legs there be a bit less than 3 inches remaining. Also any mis measurements will be magnified 3x in the cutoff so comparing those pieces is the fastest way to ensure the parts are all the same size. Looks pretty close to me.
SAFETY TIP: just behind the cut-offs you notice that my table saw blade is fully retracted. Whenever I'm not using the saw I fully retract the blade to prevent damage to it AND me. I also unplug the unit. The protruding "shark fin" is the riving knife which is stationary and not sharp. It's there to help prevent kick back. Some people take these off their saws as they can limit the things you can do. Almost invariably, those people acquire the nickname "Stumpy". Leave the riving knifes on your table saw.
A note on cutting. Marking the length with a straight edge is really important but you also have to remember the blade has a width to it - usually 1/8 of an inch. In the picture, I've marked a length of wood 24 inches and I'll place my saw blade to the left of that mark. I tried to draw out the width of the blade. I'm sure it's to scale. Positioning the blade so it's right side just touches the line on it's left side ensure a clean and accurate cut.
As you progress in woodworking one of the first things that change is your tolerance for cut accuracy. When first starting out its 1/4 of an inch +/- is fine but as you get more experience that gap reduces. I'm a mid skill person so I'm in the 1/32 on an inch range.
All of the parts are now cut to length. If you "embiggen" the picture you can see my highly detailed plans for the bench. Ok there just some rough scribbling which I'll clean up and post later.
There are six vertical supports on the bench. I cut lap joints on the four corner supports.
On both sides!
Initial assembly of the end caps for the bench. I got out my trusty DeWalt cordless nail gun to shoot 1 1/4 inch brad nails into each joint to hold it in place while the glue dries. It's important to ensure everything is square so I used a framing square (it's a triangle but called a square, go figure). Wood glue was place on each part, and the I put four brad nails in each joint. You don't have to have a nail gun - clamps work just as well.
The two end caps all glued up and set aside to dry. It's dark outside so now its' time to stop.


3 comments:
"I cut lap joints" - how? Yu assume a level of expertise (in this reader anyway) :o)
"Both sides" - rather "Both ends"? :o))
No blade guard on the table saw?
A post on wood selection would be interesting also, since as you know about 50% of the 2x4s at Home depot are wet garbage.
And looking at your shop makes me think I need to exile (another) car from my garage.
Steve: I'll do a post on basic joinery in a few weeks
Laser - I took the blade guard off because I used the table saw to cut out the lap joints. For that procedure it's safer to have the blade guard off but you raise a great point that I should have pointed this out. As for Home Depot lumber most of it is bad and I will do a post on lumber selection and the cost to value of having a planer - thats my next ship purchase
Post a Comment