Saturday, July 18, 2015

Historicon 2015: Day 2

On the second day of Historicon Mike and I ran our second game - a big civil war land battle twice and it seemed to go even better than yesterday's ironclad game.


The set up the batttle had a CSA armey (to the lest of the river) and a the BIF (to the right of the river) assualting an entrenched Union army.  The CSA/BIF forces fielded 24 regiments and 3 artillery batteries vs 18 regiments and 5 batteries for the Union.  The games objective was to exit two CSA/ Brit units off the road in the center of the Union Position

The game went back and forth and Mike and I were very lucky to have a great group of 8 players, most of which played in the ironclad games the night before


The CSA assault in the center strikes home

I'll post a more detailed report when I get home but CSA/BIF won in a last second move and every one seemed to have fun.  What was even more surprising is that Mike and I won a second award for best game at the con, which was most unexpected


We ran another game later that night which had Ed and Jamie from Architects of War and the guys from Trenchwork play and that was also a blast

More to come....

Friday, July 17, 2015

Historicon 2015: Day1

Just a quick post about day 1 - it was a blast.  I ran the civil war ironclad game today and people liked it so much I ran it a second time in the evening with most of the same players showing up to play again.  A few quick shots of the first game which resulted in a resounding Union victory


I was very pleasantly surprised that the game earned an award for the day - it's hard for Naval games get an award because the terrain is a bit sparse.  


The second game was much more intense but also resulted in a Union victory but that was more due to the capitan of the USS Hartford -a young man named Cody who rolled dice like no tomorrow and simply evaporated ships with ease - we all had a good time!

Here's a shot of my terrain panels set up for the Friday land battle game


I'll post a more detailed report on the naval action when I return but overall I'm having a grand time


Wednesday, July 15, 2015

Historicon: All Packed up

 The first shot is a test build out of my terrain panel rolling cart with all the crap - oops - I mean to say important historical simulation aides I need to put on the game.  It's very stable and easy to push.  So far my plan is working.

Now the real test - the first test fit into the car.  This point is where I usually have a "Oh Sh*t" moment and realize I've measure wrong or done some other silly thing.  Not this time - the damn thing fit like a glove with the wheels and hand bar removed.

The car packed with everything else - a few thousand 28mm ACW figures, terrain, 30 os so 1/600 ironclads and associated terrain.

Note to self - naval games are A LOT easier to transport.  Let's try and remember that for HCON 2016!

OK I hit the road in a minutes

Huzahhhh!!!!!!!

Monday, July 13, 2015

Sectional Terrain: Transportation

The last project associated with Historicon is building a rolling cart to help move the terrain boards, scenery and troops around the convention.  It also has to fit inside my SUV.  I came up with the following design based on the lumber I had in stock in my shop.  First I made two more panels but the long sides are 48.5 inches long and the short sides are 24 inches long.  The terrain boards fit upright inside each of the caps kind of like the filling in an oreo-cookie.   Mmmmm Oreo's..... But I digress.

Kind of confusing?  Well wait, there's more

 The bottom panel will have side rails which have been cut out and assembled.  The side rails help stabilize the terrain panels by preventing side to side movement and the end caps on each of the top and bottom panels keep the boards from moving forwards and backwards.  I'll also add some hardware tie-down points on the rails to allow for a cross stitch rope webbing to further stabilize the panels (here's where being a sailor comes in handy with ropes and knots).  Once done the panels will be stable and I'll have an additional platform on top for the terrain and troops boxes.

But how does it roll?

That was the hard part - wheels add height and my SUV will not accept anything higher than 28 inches.  That means the wheels will need to be detachable.  I came up with the following design.  The caster wheels will be attached to a 2x4 section of wood that 25.5 inches wide vs the transport body width of 24 inches.  That means .75 inches of the wheel base will stick out of each side.

Why?

I'll be attaching the wheels bases to the bottom tray with the home craftsman's best friend - velcro!  (the 1x2's in the third picture will serve as guides to fit the 2x4 wheel bases in between.  Velcro will be more the strong enough to hold the wheel on and when it's time to load in my SUV one will just roll it up to the back and step on the extended wheel base to remove the front wheels.  The lift the unit up and remove the back wheels as it slide in.  There's plenty of room beside the unit for all the other stuff.

Well that's the plan - we'll soon see if this plan survives contact with the enemy!

Monday, July 6, 2015

Sectional Terrain: Resin Pour Successful

 The resin pour for a "water effect" was successful - well almost successful, but I'm happy with the results and can work around the issues and that means the finish line is in sight.

The first picture shows the 2x2 foot river section.  I use a resin called "Magic Water" and it works very well.


 Now the left side of the 2x4 foot river section.
 Lastly the right side of the larger river piece.
 A close up of the ford on the 2x2 sections.  Here you can see one of the minor issues with the pour - in the lower center the resin "overflowed" it's banks.  In reality, I didn't notice that part of the ford's "ramp" was below river level and the resin will always fin low spots.  To me it creates an off -putting contrast between the sandy bottom (yellowish) and the now "underwater" banks.  My simple fix will be to cover most of the overflowed area in river plants as you can see on the sides.

 A shot of the fords on the larger board,  I think the rocks while oversized do a good job marking out the ford.  This photo also shows another issue with the pour - the the lower right you can see where the resin wicked up the ground foam so part of the ivy looks wet.  It will be a simple fix to add a bit more foliage to cover up the resin infused section.  I'm also testing covering some of the infused foliage with matt medium to see if the reduces the gloss.

 Another shot of the ford.
 Looking "down-river".  You may notice a lot of stands on the river surface - those are a result of the planting the tufts alone the river banks and are not imbedded in the resin - a few brushes with a soft cloth and they disappear.

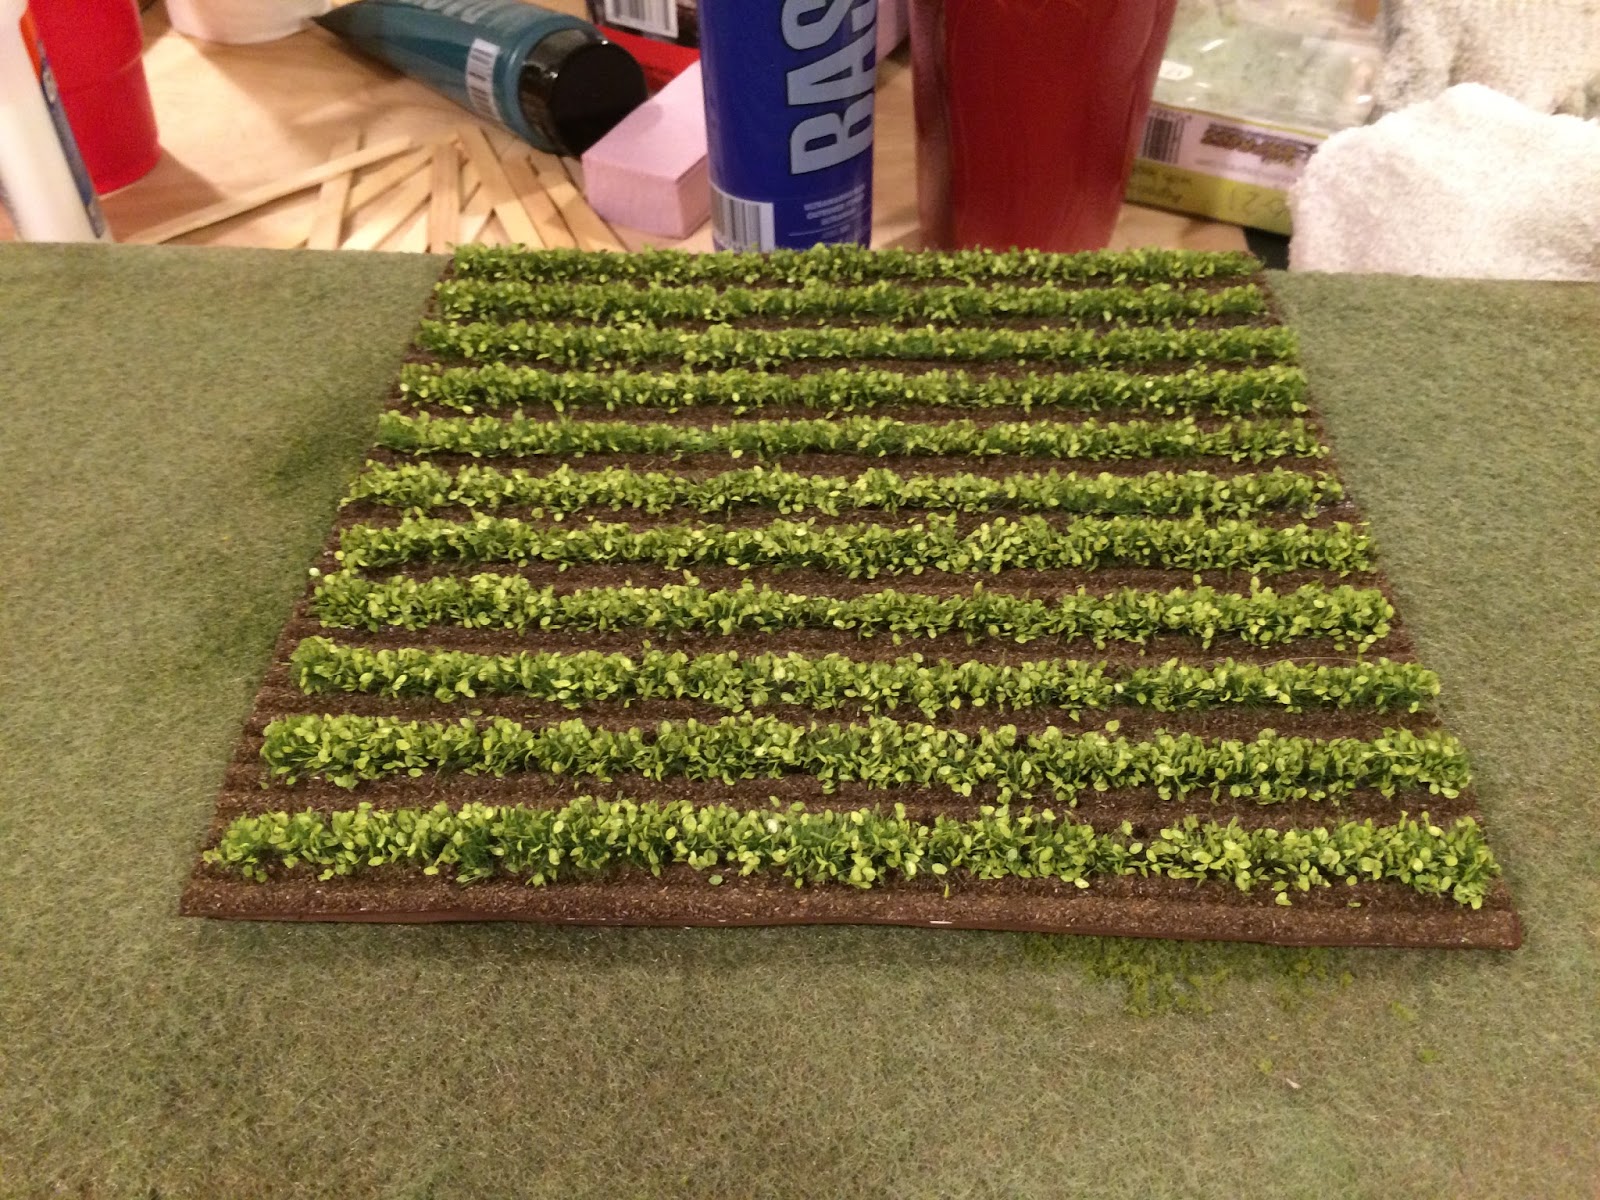
A shot of a small crop field (it's roughly 8 x 9 inches).  There's also one with out crops you can see in one of the photos above.
 One last issue with the pour is that I didn't dam one of the ends of the 2x2 board properly and a bit of the resin leaked out and adhered the board to my gaming table top.  It took a bit of force to separate the two and I'll need to repair the table top with some wood putty when I have a moment.

A few key learnings for me with resin water effects:

(1) Make sure the area's you want resin to be located are to lowest points on the terrain piece
(2) Add vegetation along the sides AFTER the pour
(3) Triple check the dams at each end of the river to look for leaks
(4) Have lots of grass tufts in various shades and sizes on hand to cover up any mistakes!

My remaining convention to-do's now include just:

(1) Building a rolling cart to facilitate transport (I have a simple design and just need to purchase a few metal tie-on points for the cargo straps).  It should take me no more than an hour to build

(2) Edit and print out the player aides for both games.  For some reason this task always slips to the night before departure.  Players spotting typos and grammatical errors may earn a free re-roll!


The other big news is that our raspberry bushes are coming in right now and my wife is picking 1-2 buckets of raspberries a day - my wife loves berries and says this is the best season she can remember.  We had smoked pork chops with a raspberry sauce last night which was actually very good.


Friday, July 3, 2015

Sectional Terrain: Roads Completed and the Project is close to the finish line....

 My gosh this is a never ending project.  At least I don't have to work on it in a suit and tie like poor old Legatus Hedlius (just teasing, my British friend).

The roads are now done - the remaining steps were to paint them with Iraqi Sand colored house paint.

 A shot showing a road section I made 4 years ago using a similar method.
 Once the paint has dried a quick wash of diluted black craft paint in water (approx 1 part paint to 15 parts water)

 Serviceable roads emerge!
 Another shot of the finished product - not the most detailed but will suit my purposes.

 I did manage a little silly detail for one of the forrest plates - a dinosaur fossil sculpted out of greenstuff.  It's a good thing I'm not a professional sculptor, 'cause I'd starve for sure.

I did decide to go ahead and pour the resin for the rivers this morning - either I'll be very happy in a few days or very sad but that is the way with resin.

Not pictures are some additional crop fields and a hill I've made which should bring terrain making to a close for the HCON games (I hope)


Wednesday, July 1, 2015

Sectional Terrain: Basic Roads

 With the tree plates and naval terrain done (mostly, more reports to follow on both), the last remaining "big item" is to make some road sections.  I use a very simple method that is way to do and provides good results.  The first step is to cut out the basic road shapes.  I prefer to use Mat board as the underlayment - it's durable and cheap.  Road width is really a function of scale - I went with 2.5 inches since these roads will be used with both 28mm and 15mm minis.  Roughly 30 minutes of drawing and cutting with a hobby knife results in 23 feet of road sections.

The benefit of the mat board is that it is both flexible enough to be curved to follow contours but strong enough to resist warping as the silicon caulk cures.

 The next steps is to cover the road sections with silicon caulking.  I use a product in the US called DAP Dynaflex 230.  The important features are to select a caulk that is both flexible and paintable.  Squeeze out a generous bead of caulk over the road section and spread it out with a tool - I use a craft stick.
 Once the caulk is spread the next step is to smooth it out.  I like to use a damp foam brush to do the smoothing.  Don't use a good brush to do the smoothing because it will get ruined from caulk adherence.
After all the road sections have been "caulked" I like to go back and add wheel ruts.  The ruts are created by running a clean craft stick edge down each section 8-10 times - a bit more for intersection pieces.  Don't press too hard as deep ruts don't look that good.

To the right of the picture you can see my very sophisticated curve making tool - an old paint stirrer stick with holes drilled every 2.5 inches (the width of the road).  I find it easier to make road curves in 90 degree angles and then cut the finished section to be 45 degrees.

Let the road sections cure for 24 hours and they're ready to paint and flock.

From a time perspective it took me roughly 2 hours to get to this point and there's probably another 1-1.5 hours left to paint and flock.  The total cost of this project is:

Mat Board (1.5 20'x32" inch board @ $4.15 each): $6.23
2 tubes of DAP Dynafelx 230 @ $4.38 each: $8.76
1 foam brush: $0.75
Paint and ground foam: $5.00 (just a guess)

Total cost for 23 feet: $20.74 or $0.90/foot

That's not very expensive and is both a lot cheaper and just as nice as some commercially available products:

Flex Roads: 12' for $45.00: $3.75 / foot
- These are really nice and have a good grain so I think the quality is better than my method

Battlefront/Galeforce 9: Rural Roads 6 feet for $45.00: $7.50/foot
Nice sculpting but really high profile and super expensive.

EDIT: How does the road curving tool work?
It's really very simple - the thin board has holes drilled every 2.5 inches (the width of the road) and then I use the tool to draw a curve.  Anchor the bottom point with a nail or Phillips head screw driver and us a sharpie of each outer hole to draw curve (like a compass).  Start with the outer most hole (12.5 Inches on my stick) and draw a curve.  I found a 90 degree curve works best.  Being careful not to move the bottom control point, put the tool back to the initial point and then draw a second curve at the next lower point (10 inches) and repeat.  Soon you'll have marking for curves that keep the desired road width constant.


Tuesday, June 30, 2015

The British Intervention Force Expands!

 The British Intervention Force (BIF) has expanded to 6 battalions of infantry, 2 artillery batteries.  The are even rumors of a unit of Lancers...


All of the miniatures are for the 28mm scale Perry BIF range and are really topnotch
 The three infantry battalions are the latest reinforcements.
How will these gaudily clad troops fare against the battle hardened veterans of the Union army - we'll soon find out at Hisotricon.....

Monday, June 29, 2015

Sectional Terrain: Initial painting of the Forrest plates

 Most of the weekend was taken up with sailing so there isn't a lot of progress to report.  Last night I did manage to basecoat the tree plates and land sections.  Not the most exciting of updates but one that needs to get done.
 I'm using a latex paint I had made at a local hardware shop based on paint samples from Vallejo Flat Brown (984) and Iraqi Sand (819).  I wanted a darker color for the forrest floors and went with straight Flat Brown rather than the 2/3 Flat Brown and 1/3 Iraqi sand mix I used on the terrain panels.  The rocks are a flat Liquitex grey and then I mixed a little brown in the unused grey to paint the tree trunks.  Once this has dried for 24 hours (the latex paint takes a long time to dry), I'll dry brush the details and add a few "easter eggs" on the forrest floors.  After that, it's some flocking time and we're done!

The terrain for the ironclad game also got a base coat.  I was planning on putting some 1/600 scale houses on the terrain but have opted not too, so I can used the pieces for both 1/600 and 1/1200 scale naval games.  The hills are painted flat brown and the shoreline is Iraqi Sand.  The hills will be covered in woodland scenics clump foliage and I'm still deciding what to do (if anything) for the sandy areas.   Two other larger sections where also painted but are out of the picture.

I ran out of woodland scenics trees so one of the forrest plates will be homemade pine trees "liberated" from my old model railroading stockpile.

After both the tree plates and naval scenery is done the only remaining steps are

(1) Make some roads - I'll be using matt board (normally used in picture framing) and flexible caulk for those)

(2) Pour the resin for the river sections - I'm really nervous about the resin as there isn't a way to "un-do" a bad poor and I don't have time to re-build new river sections so the river may just get a few coats of gloss finish.

(3) Build a cart that will accommodate the terrain panels and troops easily - transporting this "crap" easily and safely is a big concern

(4) Edit and print out all the player aids for both games

T-Minus 16 days to HCON, with only 11 usable days given a business trip.  This one will go down to the wire.

Saturday, June 27, 2015

Sectional Terrain: A river will run through it and past some trees

 The river received it's first coat of paint -a bit of tan along the edges then some green and lastly some navy blue in the center.  I use Liquitex craft paints from Dick Blick Art Supply for big projects like this.  It's important to work in small sections (6-8 inches) to ease the blending of the edges.  I like to use a standard paper plate as paint pallet.  They're cheap, the wax covering prevents paint from being absorbed and the raise rim allows you to cover it with plastic wrap to preserve any color you've mixed up for a few days.  Once the paint has dried (approx 48 hrs) I'll pour the epoxy to cover the river in 1/4 inch of the material.  Pouring epoxy if always a bit nerved wracking as once it goes on your done - it's very hard (really impossible) to recover a section from a bad pour.  I use a two part resin called "Magic Water".

 Next is a set of close up shots.  First up is the 2x2 river section.  The "ford" area has an extended sandy section to make it stand out a bit more.  I've also started to dress up the river banks with some scenery materials to make the less bland.

 The left side of the 2x4 river panel.  I added a rocky bluff which will be painted once the grout / white glue "mortar" sets.

 Lastly, the right side of the river.  Sorry for the dark photo - some idiot was standing in from to the lighting (me!)

 I will be adding lots of plants along the rivers edges but have learned to do so after the epoxy sets.  Epoxy has a tendency to creep up edges (about 1/16th of an inch) which looks fine for river banks but doesn't for vegetation so I've learned to add these after it's hardened.  Pictured is my way of making reeds - clip them together as shown, trim off the bottoms and add a thin line of white glue. Once its dried I get two more popsicle stickily them along the top, move the clips up and the cut off the glued section.  I'll get 4 row of reeds out of this batch of material.  I then cut each reed "strip" into sections to glue on the board.

 As an aside, I did use some "drying" time to assemble and paint two packages of the new Renedra cross and rail fencing.  It's a fantastic product (each package provides 18" of fencing in 4, 4.5 inch sections.


 There is a decision to make on the fords - should I add rocks or not.  I made some simple "boulders" out of pink foam scrap and placed them in the fords - remember they will by surrounded by 1/4 inch of epoxy so will not appear to standout as much.  A few of the rocks will even be submerged.

What do you think - please add a comment if you either like them or don't.

 Another shot of the ford on the big river board.

 Here's the potential ford on the smaller board


Next up are some forrest plates.  I had a single piece of 2x4 hardboard in the shop which I needed to use for both my naval game terrain (the larger pieces) and to make forrest plates (smaller, rounder pieces) - I didn't waste much of the material:


Work stopped late last night.  The forrest plates have had the tree stands attached and have been covered in the grout/white glue mixture.  once that dries - the sections will have some nice texture that is literally rock hard.  I went out into the yard and grabbed some twigs to use as fallen logs.  The tree's will not be glue as I want players to be able to remove them to facilitate play and also for transport.  I'm using the standard Woodland Scenics ready made trees.

Some of the tree plates have some scenery materials - these are older versions that I'm redoing.

Also pictured is the scenery fro the naval game (the pieces with exposed pink foam "hills").  Those will get done over the next few days.

Whew- that's a lot of progress but I need to get cracking as I've really only got next week to get all this done for Historicon as I've got a business trip out to SF the following week!  I still have to start the roads!