Daylight savings time worked to my advantage as a lot of work was done on the bench and it's ready to start churning out terrain. As you can see from the first picture I added a removable base for both my router table (pictured) and table saw that is flush with the rest of the workbench.
The extension is removable by taking out the 2 carriage bolts that hold in in place. It's not the most wieldy thing to move about but I can hang it on the wall when not in use and store the tools under the bench
It's really important that this tool support shelf be both level and strong. I can stand on it (and did!) and look it's perfectly level. Just like I planned it.....
OK, you caught me, I had to shim the right leg 1/4 inch to get the platform level. You thought I knew what I was doing for a little bit! Ha, I'm just winging this project!
The router table is flush with the workbench which will be very useful for working with longer stock. I'm going to be making a gaming table for a friend and want to to some inlay work and will be working with 6 foot long boards.
A temporary home for some of my clamps. They can't stay there as the one outstanding to do on the project is to build some drawers to go in the space under the bench top.
Clamps are like miniatures, one can never have enough.
My wife has been after me to fix this lamp for years (literally) and it's just been quietly waiting in the shop for some attention. I decided it would be the first project on the bench in order to curry the favor of executive management. The lightbulb fixture needed to be replaced so a little bit of wiring work and
Let the light shine in! The Boss Lady was actually appreciative of my humble gesture and has labeled the workbench not a complete waste of time. Ahh sweet victory!!!
I may have forgotten to mention to her that the main purpose of the bench is hobby related - it's probably best not to bother her with such mundane topics..
As for the holes in the work surface - those as 3/4 inch in diameter and there are 40 of them at regular intervals. Why? the holes are for "
bench dogs" (the blue dots in the upper left) which are removable anchor points that help with fixing something in position for sanding or planing.
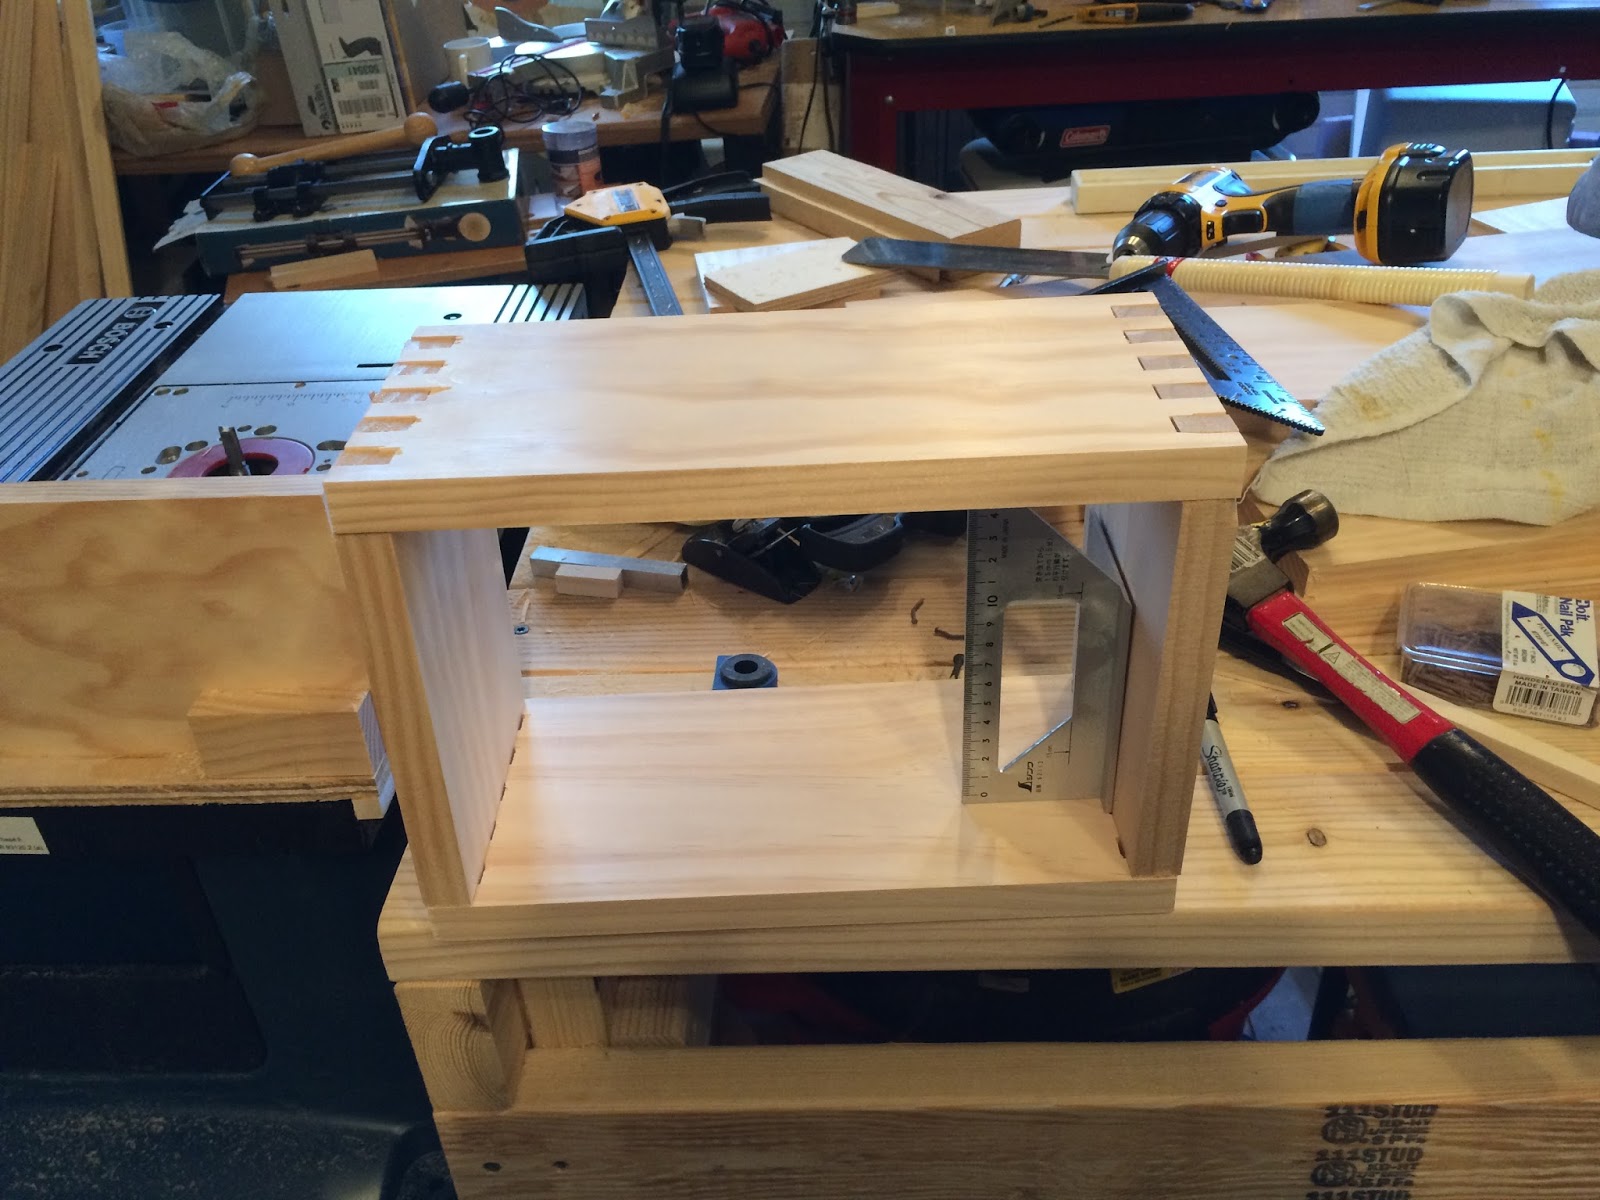
With the lamp fixed, the new router was just crying to go out for a spin. I loaded a 1/2 inch straight bit and did some test passes on some scrap. Hmmm I wonder what I'll build with this tool?
The safety goggles in the picture have reminded me that I don't spend enough time talking about shop safety in these posts. I wear eye protection whenever I'm in the shop and also wear ear protection when running a loud tool like a router or table saw. If you're thinking about doing a similar project, please read all the tool safety instruction and if you're unsure ask for help.
I hear chicks dig guys in safety goggles too....
If you are in the states and like woodworking there are a few companies I recommend:
Rockler
Kreg Tools
McMaster Carr (more hardware but lots of cool stuff and the best customer service I ever experienced)