Tuesday, April 12, 2016

Steve's Gaming Table: Part 5 - Accessory Rail Access Points

Last night I cut in the access points for the accessory rails on each of the 4 top apron pieces. To do this I built a simple jig.  The bottom part of the Jig is used for drilling out the holes for each accessory piece and the top is used for drilling out the access point so the T-Slot screws can gain entry into the channel.

 The concept makes more sense when shown after the access points have been installed.  Each Accessory tray, cup holder, dice bin etc is slipped into the rails and then slid over and tightened down.


The apron end caps will be cut from these blocks of scrap exotic wood.  I think it's teak but I'm not sure.  I'll need to cut these down to 4 pieces that are 1x1x5.5 inches for the top apron corners and 4 that a 1x1x4 inches for the bottom apron corners.

I've got a giant box of exotic scrap / cut-offs from a lumber yard but really don't know exactly what I've got.  Lets call it "mystery wood" for now.

Monday, April 11, 2016

Play Testing Fire & Fury Brigade: The First Day at Gettysburg

 Yesterday I got invited over to Rich's house for a play test of his revised Fire and Fury: Brigade rules, which is coming out in a new version (hopefully by year end).  With the base unit being a Brigade, one can play rather large battles and that's what we did - the entire first day of Gettysburg in 15 mm scale.
 Of course, Rich's tables are really things of beauty - the second picture show missionary ridge across the the top and the town of Gettysburg at the bottom.

Check out the rules at Rich's website: Fire and Fury.

 I'll just let the pictures speak for themselves.  I commanded a division form the Union 11th corps and lets just say my generalship was "off" - I got my butt kicked but had a blast.  I also got to meet another local gamer which is always a plus.

 The Brigade level rules are similar but not the same as the regimental but I really liked them.  It was really fascinating to see a"whole Battlefield" play out in front of you.


 My defenses crumble against the onslaught of Early's division.

 Hmmm, I wonder where the confederate attack will focus on?

Saturday, April 9, 2016

Steve's Gaming Table: Part 4: The Frame is Built

Whew - this was a busy morning.  The basic frame for Steve's gaming table is complete (except for some decorative finish work.  Here's a shot of the assembled frame - it will all be held together with wooden pegs and some brackets so the table can make it's ways down to Richmond.

 First thing thins morning, I clamped together the top apron to make sure everything fit.  This is always a little scary as mis-measuring of misquoting shows up right about now....

 The width is 48 inches and the..
 Length is 72 - bang on.  To be honest that's never happened before!
 All the top aprons clamped into place .  I'll be using wooden pegs to hold the top aprons on the table.
 The first step is to drill out a jig so the holes are positioned correctly.  The jig will also allow me to use a hand drill which will be a lot easier and safer
 First test of the jig is a success.
This picture shows "A" corner with the page in place for each apron - it now rakes a good bit of force to remove the tops.

 "B" corner - I ran out of 5/8 inch dowel so one of the pegs is a bit sort.  I'll run out to the hardware store later this weekend and replace that bit.


 I then cut the lower apron parts and assembled them.
 The other lower aprons waiting to be attached with clamps.  The 1x2 lip alone each apron will support a storage bench under the table.
 Moment of truth - with all the aprons attached and aligned is the table square.

"A" corner is!
 "B" Corner reporting in "Square"
 "C" in corner is all right angles too..
 And lastly, "D" corner is square also - another first in my furniture making history.

There is a lot of sanding to be done, but I think that's a job Steve can help with!

I need to add some stringers across the gaps to support both the table tops and storage bench of they will sag over time.  I need some input from Steve (and more likely his wife on some decorative choices

- Plywood for the table top or sound we go with something a bit more fancy like stair treads or a nice dark wood

- Do they want exposed attachments (plugs) or hidden ones

- Finish style

- Accessory rail parts

Sunday, April 3, 2016

Steve's Gaming Table: Part 3 - the legs

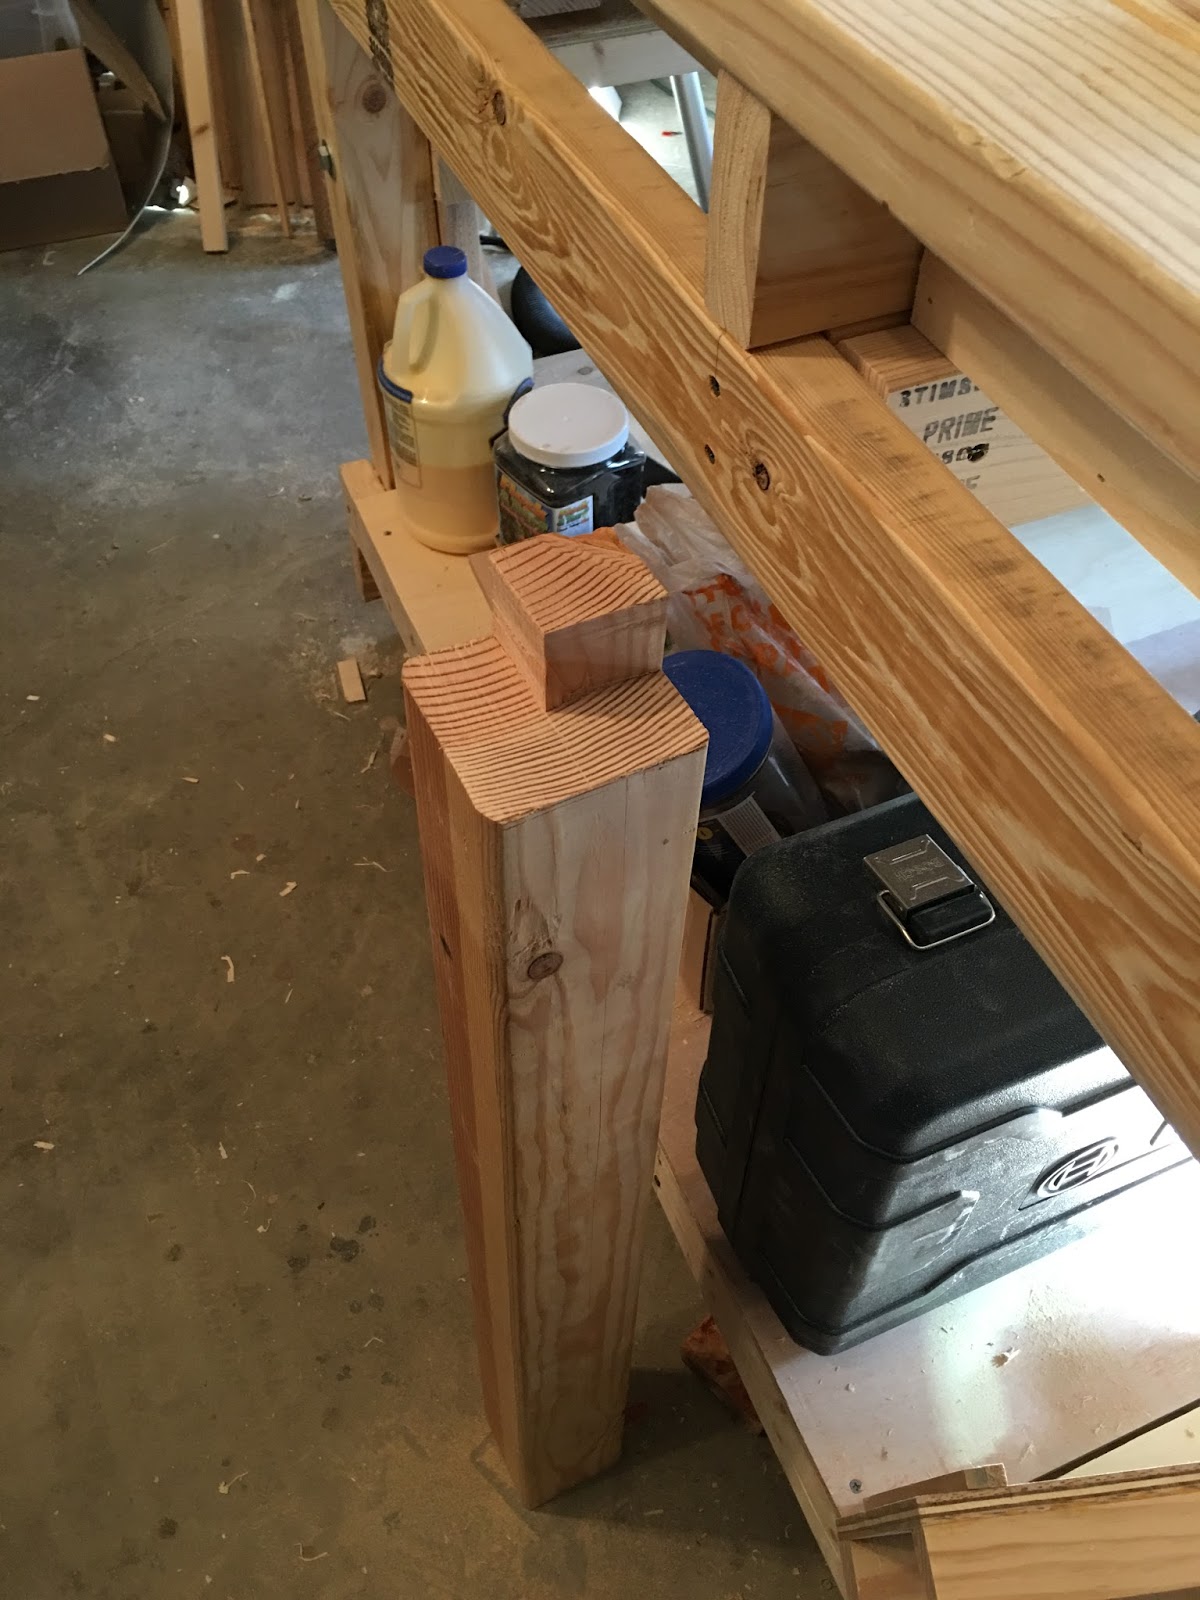
 A bit more progress this morning as I was able to cut the cedar 4x4 posts and make the legs.  The first post is up on the Mitre saw awaiting "execution"  Each leg with be 35.5 inches long which with the 1/2 inch thickness of the table top will yield a table height of 36 inches per specification.

 All four legs are cut and match in length.  One of the benefits of cutting cedar is that my workshop (ok, garage) smells nice.

 The next step is to cut the mortis slots on the legs - the 2x2's that were attached to the back of the table's top apron will fit in the removed section.  I plan on drilling 1/2 inch wide holes through the 2x2's and the legs to allow the aprons to be attached with posts.

 I decided to cut the mortises by hand.  The legs are very heavy and trying to cut these on a table or band saw without anyone to spot me is a bit dangerous.  Shop safety is never anything you want to take for granted.

 All four top mortises are done.  I'll need to do a little hand chiseling and filing to ensure they all are square but it's in good shape.  The legs will need a second set of mortises cut for the bottom apron and shelves - that's a next weekend project.


All done for this weekend and everything is stored away on top my work bench.

I need to get the table done in the next two weeks (excluding finishing / sealing).    A full parts list will be posted at the end of the project.  I'd do it now but I'm not sure what all the parts will end up being!

Steve's Gaming Table: Part 2 Top Apron's Done

 The top apron's are are complete.  An apron is a wooden panel that connects the legs and top of a table (it's the sides).  Each panel was run through the router 3 times - twice to cut the 3/8 inch slot and a third to create the T-Slot.  That took a good bit of time but all four sections came out great with no tear outs.  Have I mentioned yet how much I love my new Rockler router table?
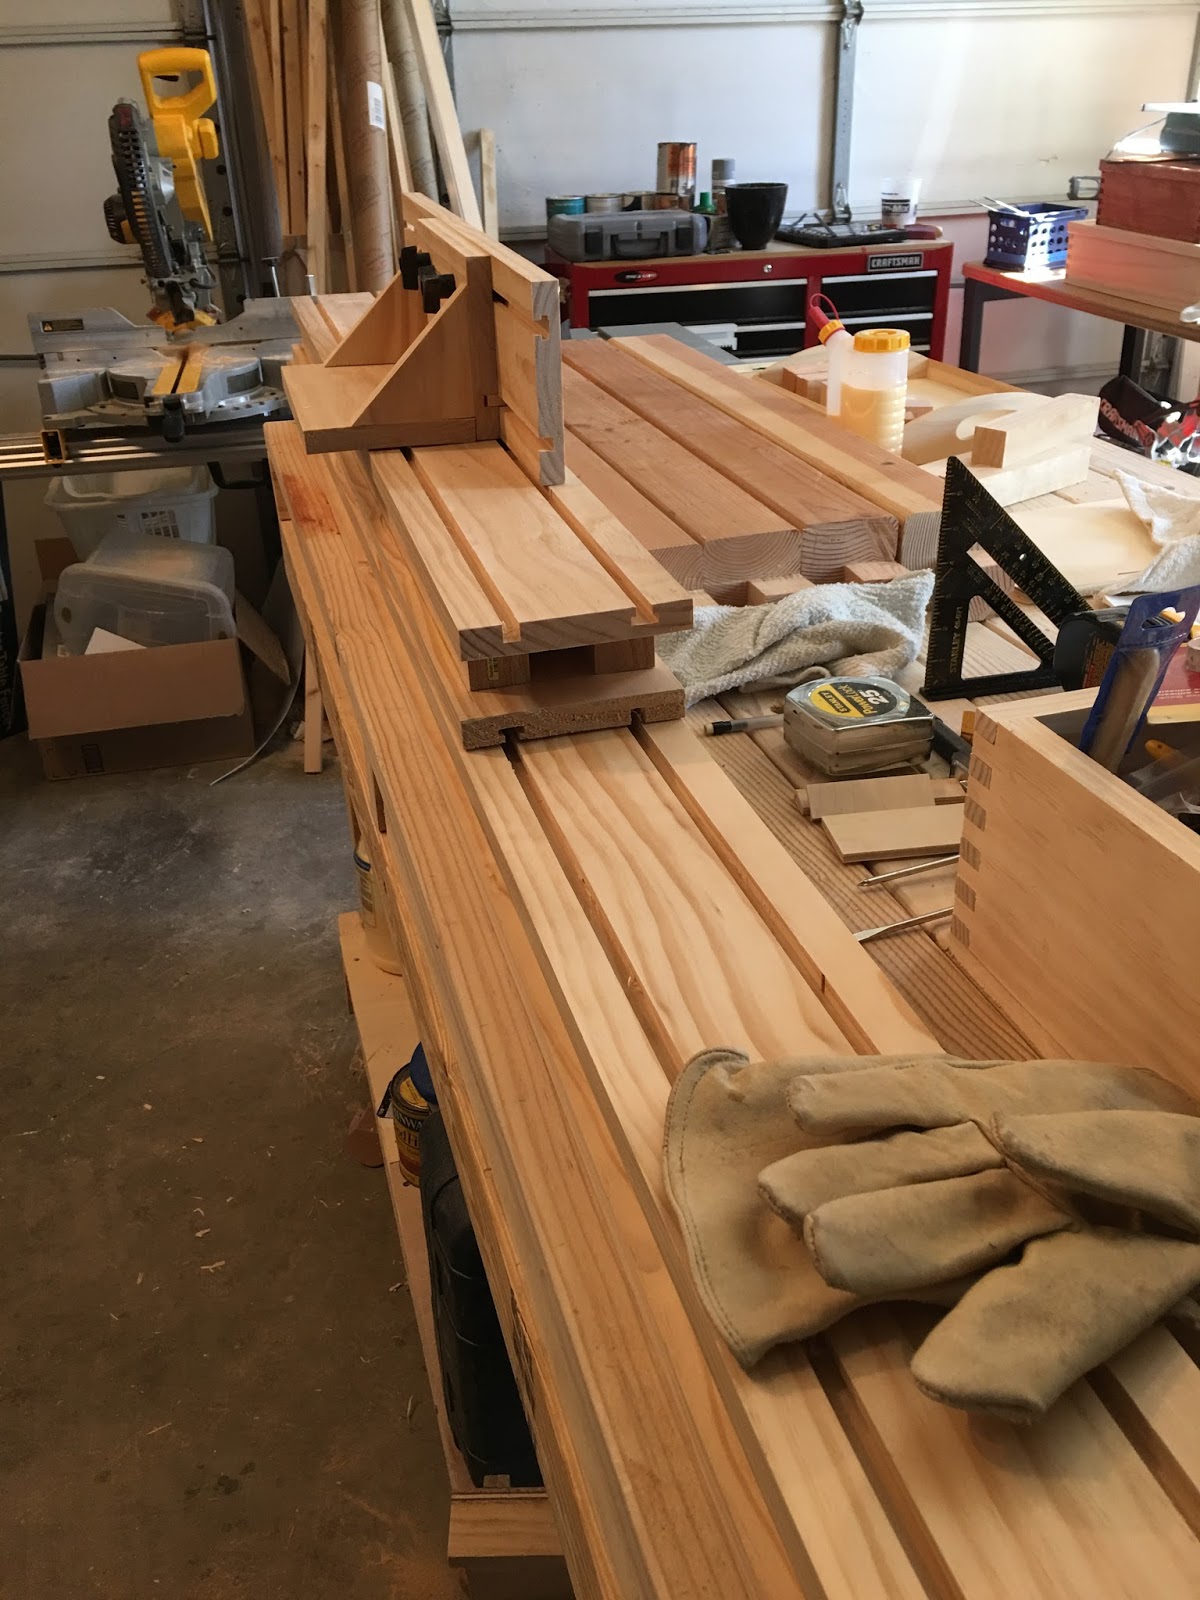
The next step in the "Plan" is to attach planed 2x2 lengths along the back of each apron to provide support for the T-Slot and create a 1/2 inch lip along the top for the table top to fit in.

The 2x2's will also form a crude tenon that will fit in a mortise that we'll cut into the 4x4 table legs.

By the way, when I use the term "Plan" it's pretty loose.  I've got some scribbles on graph paper and some ideas I've stolen from Mark Spagnuolo over at the Wood Whisperer website / youtube channel.  He's got a great website for learning about woodworking and I find his style very conducive to learning.  A lot of the mini's painted during the recent Analogue Hobbies Painting Challenge were done while listening/watching his how-to vid's.  Plus he's a gamer.  In fact, I purchased a set of plans for a game table he's made and have simplified them to match my limited skills.  Here's a link to the overview video of Marc's game table.  If you want to learn about woodworking I highly recommend his site.

 Here's a picture of the one long section (6 ft) and one short apron (4 ft) set up as the would appear on the "assembled table"

 The 1x2 nestle together and will be sitting in a mortise that will be cut into the leg.  I'll also use some hidden "L" brackets to tie everything together.

That corner looks king of ugly doesn't it?  Don't worry there will be a decorative cut of a hard wood placed there to hide the gaps and add a nice accent.
I do need to cut access wholesaling each apron to allow the t-bolts to be inserted and will do that once I've finalize the accessory panel design (how far aport the T-Bolts will be from each other).

The next step in the project will be making the legs.  I'll be using 4x4 cedar posts for the legs.  Why cedar? because it looks nice and I've had 2 8 ft posts sitting in my workshop for years and they need to get "used".


Saturday, April 2, 2016

New Project: A Custom Game Table for Steve

 A friend of mine, Steve M (from WWPD) just bought a new house.  I've really enjoyed gaming with Steve and thought it would be nice to build him a custom game table as a house warming present.  Here's a picture of his table in a more natural, shall we say "relaxed" form.

This morning I decided to test a concept I always wanted on my table - accessory rails to reduce table top clutter.  What are accessory rails you ask - read on my friends.


 Here's my brand new Rockler router table - pretty damn sexy eh?

In order to create the rails and t -slots I need to router out two groves with a 3/8 straight bit.  The second photo shows me lining up the spacing for the initial router passes.  Once the two straight passes are complete I change out the bit for a T-Slot one and made a single pass....
 and this is the result - the T-Slot hold a T-Bolt (very creative naming) which is used to lock the accessory in place.  I'll be using 2 T-bolts to lock downs and will space them 5 inches apart.  The spacing is a bit arbitrary.

 Here's what the T-Bolts look like in place and you can see the holes for the accessory face plate to the left.
A rough cut accessory tray in place.  Don't worry this is just a test piece made from scrap, I'll build more attractive looking trays later.  This mornings exercise was just to make sure the concept works.

I've also got some much nicer brass nobs on special order so the finished table will not have those big, ugly but effective black plastic knobs.
The tray in use - I'm sure all of you game with a supply of wood glue always at the ready?

Side shot of the rail system. Why the second slot without a T-shape?
The trays will have a wooden tongue to fit in to add strength and stability.  My calculations tell me the trays will hold 150 pound before splitting.  I'll test that later today.

I did a really sloppy job on the test tray - the bottom section doesn't align flush (yikes) - very embarrassing.

The rail system will go around all four sides of the 6x4 playing surface.  I'll make trays to hold troops, and few drink holders and a maybe a dice tower.  If I get comfortable with the weight bearing nature of the trays I'll also make some that will act as table extenders to increase to playing size.

Help me out with some other ideas for accessories you'd like to see built into a game table.